1.0 Installation
The Terminal ID Manager must be installed, activated, and then configured before you can assign IDs to emulator sessions.
Use the Management and Security Server (MSS) automated installer to install Terminal ID Manager either on the same machine or a different machine from where MSS is installed.
1.2 Run the MSS automated installer
For maximum flexibility and performance, you may want to install the Terminal ID Manager Add-On on a separate machine from the one used by the Administrative Server (where Management and Security Server is installed).
Use the MSS automated installer to place the activation file in the required location.
Follow the steps for installing Terminal ID Manager either on a separate or the same machine:
1.2.1 To install Terminal ID Manager on a separate machine
-
Run the Management and Security Server (MSS) automated installer on a different machine from where MSS was initially installed.
NOTE:The Terminal ID Manager activation file must also be on the separate machine.
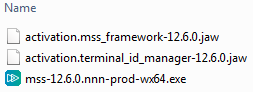
For ease of installation, place the activation file, activation.terminal_id_manager-12.6.<n>.jaw, in the same directory as the automated installer.
When you run the installer, the activation file will be placed in the required location.
-
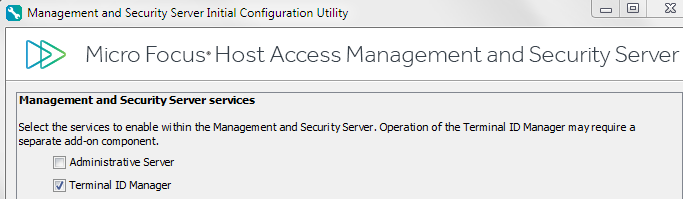
In the early installation panel, select only the . (Leave the Security Proxy unchecked on the separate machine.)
-
When the panel displays, enable only the service.
-
Check to be sure that the Terminal ID Manager activation file (activation.terminal_id_manager-12.6.<n>.jaw) is installed on the separate machine in this location:
C:\Program Files\Micro Focus\MSS\server\web\webapps\tidm\WEB-INF\lib\modules
If the activation file is not present, copy it from your download location to the ...\tidm\WEB-INF\lib\modules directory on the separate machine.
-
When you return to the automated installer, select the option to .
-
Continue with the Initial Setup.
1.2.2 To install Terminal ID Manager on the same machine
If you installed Management and Security Server without selecting Terminal ID Manager, you can run the automated installer again to update the installation to include Terminal ID Manager on the same machine. .
-
Run the automated installer to install Terminal ID Manager.
NOTE:The Terminal ID Manager activation file must also be installed on this machine.
For ease of installation, place the activation file, activation.terminal_id_manager-12.6.<n>.jaw, in the same directory as the automated installer.
When you run the installer, the activation file will be placed in the required location.
-
On the early installation panel, check that the Terminal ID Manager will be enabled.
-
When the automated installer completes, select the option to .
-
Verify that the Terminal ID Manager activation file is installed:
-
In the Administrative Console, open .
-
In the column, look for Terminal ID Management Add-On.
-
If present, the activation file is installed on this machine.
-
If not present, click , and upload the activation file from your download location.
-
-
-
Continue with the Initial Setup.