FTP file transfer
After the administrator configures a session to include FTP functionality, click  to open the FTP File Transfer window containing a list of host files that are available to transfer. Directories and files are indicated by an icon when you select the file.
Transferring files
-
Select the transfer method. The options are:
-
Binary
Use for program files and other types of files that should not be translated, such as files that have already been formatted for a particular type of printer or files with application-specific formatting. Binary files contain non-printable characters; using this method, a file is not converted or translated during the transfer.
-
ASCII
Use to transfer text files with no special formatting. ASCII files on the PC are translated to the EBCDIC character set on the host and host text files are converted from EBCDIC to ASCII when they are downloaded.
-
-
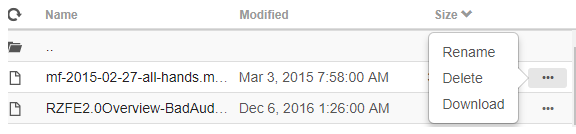
You can rename, delete, or download a file from the list of files.
-
Refresh the file list at any time by clicking the icon in the upper left corner of the File Transfer dialog box.