Making Secure Connections

Reflection ZFE and Management and Security Server use HTTPS connections and certificates to ensure secure communication between clients, web browsers, and servers.

Certificates are electronic credentials that are used to verify the identities of individuals, computers, or networks. Certificates are stored in keystores along with private keys that are used to complete secure transactions. Public keys encrypt data then the private key decrypts the data. Together, the public and private keys are known as a keypair

Reflection ZFE and MSS use Bouncy Castle as the provider for their keystore operations and use the.bcfks (bouncy castle fips keystore) extension for cryptographic files. All keystore entries are identified using a unique identifier, known as an alias

Values you must know

Value

Reflection ZFE

Management and Security Server (MSS)

Default password

changeit

changeit

Alias

servlet-engine

servlet-engine

Keystore format

bcfks*

bcfks

*Due to a keytool issue, Reflection ZFE starts with a java keystore (.jks) format and then converts the keystore to a .bcfks format after the CA Reply is received.

In a typical Reflection ZFE installation there are three main connection points that you need to consider in regard to security:

About Java Keytool and certificates

The Java Key and Certificate Management Tool documentation is available for both Unix and Windows platforms:

Securing the Web Browser to the Session Server

NOTE:The keystore commands noted here are for a default installation and start at the sessionserver/etc directory. If you have installed Reflection ZFE to another location, you must modify the path appropriately.

To secure this connection:

  • Create a Certificate Signing Request (CSR) for Reflection ZFE

  • Import a CA-signed certificate/chain into Reflection ZFE for HTTPS

How to create a CSR for Reflection ZFE

Windows

Create Key Pair (replace the dname parameter with your own) :

..\..\java\bin\keytool.exe -genkeypair -dname "CN=zfe-1.microfocus.com, O=Micro Focus, C=US" -alias servlet-engine -keyalg RSA -keysize 2048 -keystore servletcontainer.jks -validity 1095 -storetype jks -storepass changeit -keypass changeit

Generate Certificate Request:

..\..\java\bin\keytool.exe -certreq -alias servlet-engine -keystore servletcontainer.jks -file cert_request.csr -ext ExtendedkeyUsage=serverAuth -storetype jks -storepass changeit

UNIX

Create Key Pair (replace the dname parameter with your own) :

../../java/bin/keytool -genkeypair -dname "CN=zfe-1.microfocus.com, O=Micro Focus, C=US" -alias servlet-engine -keyalg RSA -keysize 2048 -keystore servletcontainer.jks -validity 1095 -storetype jks -storepass changeit -keypass changeit

Generate Certificate Request:

../../java/bin/keytool -certreq -alias servlet-engine -keystore servletcontainer.jks -file cert_request.csr -ext ExtendedkeyUsage=serverAuth -storetype jks -storepass changeit

After you receive the certificate from the CA, you will import the certificate into Reflection ZFE.

How to import a CA-signed certificate/chain into Reflection ZFE for HTTPS

If the CA Reply contains separate root and intermediate certificate files, import the root certificate into the keystore first, followed by the intermediate certificate.

These examples use keytool commands at the sessionserver/etc directory.

Windows

Import Root CA and intermediate certificates

..\..\java\bin\keytool.exe -importcert -alias rootca -trustcacerts -file <RootCA.cer> -keystore servletcontainer.bcfks –storetype bcfks -storepass changeit

..\..\java\bin\keytool.exe -importcert -alias intermediateca -trustcacerts -file <IntermediateCA.cer> -keystore servletcontainer.jks –storetype jks -storepass

Import CA Reply

..\..\java\bin\keytool.exe -importcert -alias servlet-engine -trustcacerts -file <CertChainFromCA.p7b> -keystore servletcontainer.jks –storetype jks -storepass changeit

Convert keystore to BCFKS format

Before running the following command, rename existing servletcontainer.bckfs to servletcontainer.bckfs_prev:

..\..\java\bin\keytool.exe -importkeystore -srckeystore servletcontainer.jks -srcstorepass changeit -destkeystore servletcontainer.bckfs -deststoretype bcfks -deststorepass changeit -providername BCFIPS -providerpath ..\lib\bc-fips-1.0.1.jar -providerclass org.bouncycastle.jcajce.provider.BouncyCastleFipsProvider

UNIX

Import Root CA and intermediate certificates

../../java/bin/keytool -importcert -alias rootca -trustcacerts -file <RootCA.cer> -keystore servletcontainer.bcfks –storetype bcfks -storepass changeit

../../java/bin/keytool -importcert -alias intermediateca -trustcacerts -file <IntermediateCA.cer> -keystore servletcontainer.jks –storetype jks -storepass

Import CA Reply

../../java/bin/keytool -importcert -alias servlet-engine -trustcacerts -file <CertChainFromCA.p7b> -keystore servletcontainer.jks –storetype jks -storepass changeit

Convert keystore to BCFKS format

Before running the following command, rename existing servletcontainer.bckfs to servletcontainer.bckfs_prev:

../../java/bin/keytool -importkeystore -srckeystore servletcontainer.jks -srcstoretype jks -srcstorepass changeit -destkeystore servletcontainer.bckfs -deststoretype bcfks -deststorepass changeit -providername BCFIPS -providerpath ../lib/bc-fips-1.0.1.jar -providerclass org.bouncycastle.jcajce.provider.BouncyCastleFipsProvider

Securing the Session Server to MSS

To secure the session server to MSS, using the Administrative Console, you register the session server with its associated MSS. When you follow this process, secure connections are handled automatically.

To register the session server:

  1. Open the MSS Administrative Console.

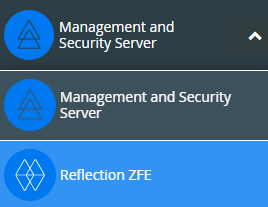
  2. From the upper left panel, click the arrow and choose Reflection ZFE

  3. On the right panel, click Add to register the session server. There is help available for each panel.

Securing the Session Server to the Host

Follow these steps to configure a TLS connection between the Reflection ZFE session server and a host that supports TLS:

How to configure the keystore in MSS

For a Reflection ZFE session to trust the TLS host it connects to, the public certificate of the host must be added to a trusted keystore using the Management and Security Server (MSS). The Reflection ZFE session retrieves this certificate the first time a session connects.

Open the MSS Administrative Console > Configure Settings > Trusted Certificates and choose Terminal Emulator Clients. You can access the documentation for the Administrative Console by clicking the Help icon in the upper right of the page.

When the certificate is successfully added to the MSS server's trusted keystore, you are returned to the list of certificates and you should see the new host.

How to configure a Reflection ZFE terminal session

Depending on your host type, you can configure a terminal session using different security protocols.

To configure a terminal session using TLS

To connect to the new trusted host using TLS, configure a Reflection ZFE terminal session as usual, and in the Settings dialog box, specify TLS as the security protocol. Make sure to specify the correct TLS port for the connection.

To configure a VT terminal session using Secure Shell (SSH)

Secure shell provides encrypted communications between the client and a VT host.

MSS has a known hosts list that contains the public keys of hosts that you can connect to using SSH. SSH connections can be made only to hosts already trusted by an administrator.

The first time an SSH connection is made from a Reflection ZFE session to a host, the known hosts file is downloaded from MSS to the Reflection ZFE session server.

When you attempt to create or edit a session using SSH in the session management panel, you will be notified if the key is not recognized as trusted and asked if you want to trust the key and continue.

  • If you enter yes, the host will be trusted and added to the known host list, and you will be prompted for the SSH host password.

  • If you do not answer yes, then the host will remain untrusted and the session will be disconnected.

You can also configure the SSH known hosts file manually by establishing an SSH connection from a Reflection ZFE session to the host, and adding the remote host’s key fingerprint to the known hosts list in MSS.

Configure known hosts file for SSH connections using MSS

To configure the known hosts file for SSH connections in MSS:

  1. Connect to the system where MSS is installed and navigate to the server’s certificates folder: C:\ProgramData\Micro Focus\Mss\MssData\certificates (Windows) or /var/opt/microfocus/mss/Mssdata/certificates (UNIX).

  2. Copy the public certificate file of the new SSH host into the MssData/certificates (Windows) or /etc/ssh/ssh_host_rsa_key.pub (UNIX) folder described above. Only ssh-rsa and ssh-dss are valid as public key types for MSS known_hosts entries.

    The host’s public key format can be OpenSSH, Base64-encode,.DER, or.PFX. The file should follow this format: hostname, IP-address key-type key. For example, a public key entry might look like this: alpsuse132, 10.117.16.232 ssh-rsa AAAAB3NzaC1yc2EAAAADAQABA...........

  3. Log in to MSS (for example, http://mycompany.com/adminconsole).

  4. Open the Administrative Console.

  5. Click Configure Settings > Secure Shell.

  6. Follow the directions in MSS to import a known host.

After the public key is imported into the known hosts file, you will return to the Secure Shell Known Hosts page and the new host will appear in the list.