4.6 Working with Sessions
All the sessions you have access to are available in the list. Sessions are initially created and configured by your system administrator and accessed through a distributed URL (for example, https://<sessionserver>:7443/zfe).
To open a session
-
Select the session and click to open.
-
Interact with your host application using the open session.
-
You can create multiple instances of a configured session.
You can have multiple sessions open at a time and easily switch between them using the tabs arranged across the top of the screen. The current session is always the left-most tab and is indicated by a white background and bold text. Each session remains active for 30 minutes.
Use the toolbar to access the various options available to you as you interact with the session. You can disconnect from a session, close the session, turn on Quick Keys, and access other settings. Some options may be only available once your administrator has granted permission.
4.6.1 Using Quick Keys
The Quick Key terminal keyboard provides a graphical representation of the keys on a host keyboard and gives you quick access to terminal keys. Click a terminal key on the Quick Key keyboard to send the key to the host. Tool tips, which are available by hovering over a key, provide a description of the mapping.
Quick keys are available for each supported host type and are accessed by clicking the tool bar icon  .
.
4.6.3 Creating Macros
A macro is a series of keyboard actions that you record and then run. You can use these JavaScript macro programs to automate user interactions with the terminal. You can access and run macros from all supported devices.
Reflection ZFE records and saves advanced macros as JavaScript, making it easy to edit and enhance your recorded macros. You can record macros to playback later, run macros at startup or when the session connects or disconnects from the host. You can also write macros from scratch to perform complex tasks that the recorder cannot capture.
Macros are made available to users in two ways; created by an administrator or recorded by users for their own private use. All advanced macros are associated with a session and they all accomplish the same goal, automating host interaction. The only difference between the two flavors is simply who can access them and who manages their creation and availability:
-
Administrators create macros when they create the session. They are specific to a session and are available to all users who have access to the session from the Macro icon on the toolbar. Administrators can designate macros to run at startup or when the session connects or disconnects from the host.
-
End-user macros are created by individuals for sessions they are authorized to access. The administrator grants permission to create macros by setting a User Preference Rule. Users can access the session under their own credentials or in a role. Macros that Guest users create are available to all Guest users. Users who are logged in using their own credentials can only see macros that they have created.
Advanced macros are listed in alphabetical order in the drop down list available from the toolbar. Macros created by the end-user are listed first and followed by an indicator of three vertical grey dots, which when selected, displays the Edit and Delete options. Macros created by the administrator are listed without the indicator as those macros cannot be modified by the end-user.
To record a macro
-
Click the Macro icon on the toolbar, and then click .

-
Navigate the host application to record the series of steps you want included in the macro.
-
Click
 on the toolbar to stop recording. The red dot pulses to indicate the recording is in process.
-
When prompted, type a name for the macro.
To edit a macro
You can edit macros that you have recorded. These macros are listed under .
To edit an existing macro:
-
From the Macro drop down list, select the macro you want to edit.

-
Click the three vertical dots to expand the field.
-
Click
 to open the Macro Editor.
The Macro Editor opens in the left panel.
-
Use JavaScript to make whatever changes are necessary. You can run and save the modified macro using the toolbar icons in the upper panel of the editor.
To run a macro
To run a macro, choose the macro from the drop down list and click ![]() .
.
You can also map keys that will automatically trigger an already recorded macro. In the Key Map settings dialog box, choose from the drop down list. Choose a macro to associate with the key mapping from the list.
To stop a macro
You can stop a macro before it completes from either the Macro Editor or the toolbar. Click ![]() to stop the macro. To rerun the macro, navigate back to the macro starting screen.
to stop the macro. To rerun the macro, navigate back to the macro starting screen.
To delete a macro
-
From the Macro drop down list, select the macro you want to delete.
-
Expand the field, by clicking the three vertical dot icon.
-
Click .
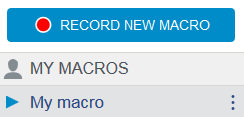
To view macros
The Macro drop down list is available from the toolbar to all users who have permission to record macros or are accessing a session where macros have been pre-recorded by the administrator for use with that session.
Macros are listed under either or depending on how they were recorded.
All users, whether they are logged in using their credentials or as Guest, can see the macros associated with the session. Macros listed under the MY MACROS heading are listed in alphabetical order by name and are visible to those users that recorded them. Macros recorded by the administrator and attached to a session are listed alphabetically under MACROS.
To debug a macro
Since macros are written in JavaScript and executed in the browser, the best way to debug and troubleshoot them is by using your web browser’s built-in tools. Modern browsers come with a very capable set of tools for debugging JavaScript code. You can place breakpoints, step through code, and output debug information.
HINT:JavaScript is case sensitive. Keep that in mind when editing JavaScript code.
To debug a macro:
-
Open the macro for editing. See To edit a macro for instructions.
-
Open your browser’s development tools.
Table 4-10 Browser debugging support
Browser
Open debugger
Mozilla Firefox 40.0.3
-
From the toolbar, open the Menu, and choose Developer.
-
From the Web Developer menu, choose Debugger. The debugger opens in a lower panel.
Google Chrome 45.0
-
From the toolbar, open the Menu, and choose More tools.
-
Choose Developer Tools to open the Debugger.
Microsoft Internet Explorer 11
-
From the toolbar, open Settings, and choose F12 Developer Tools.
-
Open the Debugger tab.
These instructions are for supported browsers and are dependent on the versions used.
-
-
Use one of the these tools in your macro code, and run the code.
-
debugger
The most thorough approach to debugging is to use the ‘debugger;’ statement. When you insert these statements into your macro code then run it, with the browser’s development tools open, the execution will stop on those lines. You can step through your macro, view the value of local variables and whatever else you need to check.
You are encouraged to place multiple debugger; statements in your code to help get to the correct line. The asynchronous nature of JavaScript can make stepping through code challenging. This can be offset by using multiple, carefully placed debugger; statements.
Example 4-1 Debugger
---------------------
var hostCommand = menuSelection + ‘[enter]';
debugger;  // <— Browser's debugger will stop here
ps.sendKeys(hostCommand);
---------------------
-
console.log(), alert()
These two functions are commonly used for debugging JavaScript. While not as flexible as the debugger statement they provide a quick way to output debug information. These functions output the information to the JavaScript “Console” tab in the browser’s developer tools.
Example 4-2 console.log(), alert()
--------------------- var hostCommand = menuSelection + ‘[enter]'; console.log('Command:' + hostCommand); // <— Will output the string to "Console" tab alert('Command:' + hostCommand); // Will pop up a small window containing the data ps.sendKeys(hostCommand); --------------------- -
ui.message()
The Reflection ZFE Macro API provides an ui.message() function that is very similar to JavaScript’s alert() function. You can also use ui.message() to output debug information.
Example 4-3 ui.message()
---------------------
var hostCommand = menuSelection + ‘[enter]';
ui.message('Command:' + hostCommand);  // <— Will pop up a ZFE message window
ps.sendKeys(hostCommand);
---------------------
-
Notes to keep in mind when debugging macros
-
Stepping and “yields”
While the yield statements in macros make them easier to understand, they can make the code more challenging to step through with the debugger. Consider either using multiple debugger statements or carefully placed debugger statements of console.log() calls to output the right debug information.
-
Internet Explorer
Debugging in Internet Explorer involves transformed code and may be more difficult than on other browsers.
Using the Macro API
In Reflection ZFE macros are recorded and written using JavaScript. JavaScript is a popular and prevalent programming language. There are a wide variety of learning resources and tools available to you.
The Reflection ZFE Macro API consists of a set of objects which you can use to interact with the host, wait for screen states, and interact with the user.
About promises and yields
Because JavaScript is single threaded and uses 'callback functions’ and ‘promises’ to help manage the flow of execution through code, often code can be difficult to follow. Reflection ZFE combines the concept of ‘promises' with the ‘yield' keyword so macro code can be organized in a more linear fashion.
-
Promises are patterns to help simplify functions that return their result asynchronously, at some point in the future. All ‘wait’ and ‘ui’ functions in the Reflection ZFE Macro API return promise objects.
-
Reflection ZFE macros use the yield keyword to block the execution of the macro until a promise is resolved, or done. So putting yield in front of any ‘wait’ or ‘ui’ function makes the macro execution pause until that function has finished executing. You can place the yield keyword in front of any function that returns a promise, even your own custom functions.
NOTE:The ability to make macro execution block by combining yield with promises is enabled by the createMacro() function.
Errors
Errors are handled in macros using a try / catch statement. Some API functions may throw errors if, for example, conditions can’t be met or a timeout occurs. The thrown error is ‘caught’ in the catch statement. You can wrap smaller blocks of code in a try / catch statement to handle errors at a more granular level. Macro developers can also throw errors with 'throw new Error('Helpful error message');
Macro API Objects
You can create macros using the Macro API. By default for use in macros, there are four primary objects available:
-
Session is the main entry point for access to the host. You use the Session object to connect, disconnect and provide access to the PresentationSpace object.
-
The PresentationSpace object represents the screen and provides many common capabilities such as getting and setting the cursor location, sending data to the host and reading from the screen. It is obtained by calling session.getPresentationSpace().
-
Provides a simple way to wait for various host states to occur before continuing to send more data or read from the screen. For example, you can wait for the cursor to be located at a certain position, text to be present in a position on the screen or simply wait for a fixed amount of time. All ‘Wait' function calls require the yield keyword, which is explained below.
-
The UI object is made automatically available in your macro as the “ui” variable. It provides basic user interface capabilities. You can use this object to display data to the user or prompt them for information. All ‘UI' function calls require the yield keyword.
Other available objects
Attribute
Use the Attribute, along with the AttributeSet, to decode the formatting information present on the data cell.
Table 4-11 Attributes
|
Attribute |
Description |
|---|---|
|
PROTECTED |
Indicates a protected data cell. |
|
MODIFIED |
Indicates a modified data cell. |
|
NUMERIC_ONLY |
Indicates the beginning of a numeric only data cell. |
|
ALPHA_NUMERIC |
Indicates an alpha numeric data cell. |
|
HIGH_INTENSITY |
Indicates whether the data cell contains high intensity text. |
|
HIDDEN |
Indicates whether the data cell contains hidden text |
|
PEN_DETECTABLE |
Indicates whether the data cell is pen detectable |
|
ALPHA_ONLY |
Indicates an alpha only data cell. |
|
NUMERIC_SHIFT |
Indicates the beginning of a numeric shift. field |
|
NUMERIC_SPECIAL |
Indicates the data cell marks the beginning of a numeric special field |
|
KATAKANA_SHIFT |
Indicates a section of Katakana text. |
|
MAGNETIC_STRIPE |
Indicates the data cell marks the beginning of a magnetic strip field. |
|
SIGNED_NUMERIC_ONLY |
Indicates the data cell is a signed numeric field. |
|
TRANSMIT_ONLY |
Indicates the data cell is a transmit only field |
|
FIELD_END_MARKER |
Indicates the data cell marks the end of a modified field. |
|
FIELD_START_MARKER |
Indicates the data cell marks the start of a modified field. |
|
SPECIAL_EMPHASIS_PROTECTED |
Indicates a special emphasis protected field. |
|
TAB_STOP |
Indicates that the data cell contains a tab stop. |
|
REVERSE |
Indicates the data cell displays in reverse video mode. |
|
BLINKING |
Indicates the data cell contains blinking text |
|
RIGHT_JUSTIFIED |
Indicates the data cell marks the beginning of a right justified field. |
|
LEFT_JUSTIFIED |
Indicates the data cell marks the beginning of a left justified field. |
|
LOW_INTENSITY |
Indicates the data cell contains low intensity text |
|
UNDERLINE |
Indicates the data cell contains underlined text. |
|
DOUBLE_BYTE |
Indicates the data cell contains double byte text. |
|
COLUMN_SEPARATOR |
Indicates the data cell contains a column separator. |
|
BOLD |
Indicates the data cell contains bold text. |
|
DOUBLE_WIDTH |
Indicates the data cell marks a double width field. |
|
DOUBLE_HEIGHT_TOP |
Indicates a double height top data cell. |
|
DOUBLE_HEIGHT_BOTTOM |
Indicates a double height bottom data cell. |
|
CONTROL_PAGE_DATA |
Indicates the data cell contains control page data. |
|
RIGHT_COLUMN_SEPARATOR |
Indicates the data cell contains a right column separator. |
|
LEFT_COLUMN_SEPARATOR |
Indicates a data cell containing a left column separator. |
|
UPPERSCORE |
Indicates the data cell contains an upperscore. |
|
STRIKE_THROUGH |
Indicates the data cell contains strike through text. |
AttributeSet
The AttributeSet object allows the user to decode the attributes that are present on the data cell. The AttributeSet object returns values defined in the Attribute object and when used together, you can get formatting information from the data cell.
Table 4-12 AttributeSet
|
METHODS |
|
|---|---|
|
contains(attribute) |
Determines if the set contains the specifiedAttribute. Parameters {Number} attribute to check Returns {Boolean} True if the attribute is in the set. |
|
isEmpty() |
Determines if the attribute set is empty. Returns {Boolean}True if the set is empty. |
|
size() |
Indicates the number of attributes in a set. Returns {Number} The attribute count. |
|
toArray() |
Converts the internal attribute set to an array. Returns {Number[]}Array of values of attributes in the set. |
|
toString() |
Converts the internal attribute set to a string. Returns {String} Space-delimited names of attributes in the set. |
|
forEach(callback, thisArg) |
Function to iterate over each element in the attribute set. Parameters {forEachCallback} Callback to perform the specific operation. Called with the name of each attribute in the set. {Object} this Arg optional pointer to a context object. |
|
forEachCallback(string, object) |
A user provided callback function where you provide the behavior, to be used as the callback parameter to forEach. Parameters {String} String name of an attribute in the attribute set. {Object} thisArg optional pointer to a context object. |
Color
Color constants to use for the DataCell object foreground and background colors.
Table 4-13 Color constants
|
Color |
Description |
Numeric Value |
|---|---|---|
|
BLANK_UNSPECIFIED |
No color specified |
0 |
|
BLUE |
Blue |
1 |
|
GREEN |
Green |
2 |
|
CYAN |
Cyan |
3 |
|
RED |
Red |
4 |
|
MAGENTA |
Magenta |
5 |
|
YELLOW |
Yellow |
6 |
|
WHITE_NORMAL_INTENSITY |
Normal intensity white |
7 |
|
GRAY |
Gray |
8 |
|
LIGHT_BLUE |
Light blue |
9 |
|
LIGHT_GREEN |
Light green |
10 |
|
LIGHT_CYAN |
Light cyan |
11 |
|
LIGHT_RED |
Light red |
12 |
|
LIGHT_MAGENTA |
Light magenta |
13 |
|
BLACK |
Black |
14 |
|
WHITE_HIGH_INTENSITY |
High intensity white |
15 |
|
BROWN |
Brown |
16 |
|
PINK |
Pink |
17 |
|
TURQUOISE |
Turquoise |
18 |
ControlKey
The ControlKey object defines constants for sending cursor control keys and host commands using the sendKeys method. Constants are available for these host types:
IBM 3270
Table 4-14 IBM 3270
|
Key word |
Description |
|---|---|
|
ALTVIEW |
Alternate view |
|
ATTN |
Attention |
|
BACKSPACE |
Back space |
|
BACKTAB |
Back tab |
|
CLEAR |
Clear or clear display |
|
CURSOR_SELECT |
Cursor select |
|
DELETE_CHAR |
Delete, delete character |
|
DELETE_WORD |
Delete word |
|
DEST_BACK |
Destructive backspace |
|
DEV_CANCEL |
Device cancel |
|
DOWN |
Cursor down |
|
DSPSOSI |
display SO/SI |
|
DUP |
Duplicate field |
|
END_FILE |
End of field |
|
ENTER |
Enter |
|
ERASE_EOF |
Erase end of field |
|
ERASE_FIELD |
Erase field |
|
ERASE_INPUT |
Erase input |
|
FIELD_MARK |
Field mark |
|
HOME |
Cursor home |
|
IDENT |
Ident |
|
INSERT |
Insert |
|
LEFT_ARROW |
Cursor left |
|
LEFT2 |
Left two positions |
|
NEW_LINE |
New line |
|
PA1 - PA3 |
PA1 - PA3 |
|
PF1 - PF24 |
PF1 - PF24 |
|
PAGE_DOWN |
Page down |
|
PAGE_UP |
Page up |
|
RESET |
Reset, reset terminal |
|
RIGHT2 |
Right 2 positions |
|
RIGHT_ARROW |
Cursor right, right |
|
SYSTEM_REQUEST |
System request |
|
TAB |
Tab key |
|
UP |
Cursor up |
IBM 5250
Table 4-15 IBM 5250
|
Key word |
Description |
|---|---|
|
ALTVIEW |
Alternate view |
|
ATTN |
Attention |
|
AU1 - AU16 |
AU1 - AU16 |
|
BACKSPACE |
Back space |
|
BACKTAB |
Back tab |
|
BEGIN_FIELD |
Begin field |
|
CLEAR |
Clear |
|
DELETE_CHAR |
Delete, delete character |
|
DEST_BACK |
Destructive backspace |
|
DOWN |
cursor down |
|
DSPSOSI |
Display SO/SI |
|
DUP |
Duplicate field |
|
END_FILE |
End of field |
|
ENTER |
Enter |
|
ERASE_EOF |
Erase end of field |
|
ERASE_FIELD |
Erase field |
|
ERASE_INPUT |
Erase input |
|
FIELD_EXT |
Field exit |
|
FIELD_MINUS |
Field minus |
|
FIELD_PLUS |
Field plus |
|
FIELD_MARK |
Field mark |
|
HELP |
Help request |
|
HEXMODE |
Hex mode |
|
HOME |
cursor home |
|
INSERT |
Insert |
|
LEFT_ARROW |
Cursor left |
|
NEW_LINE |
New line |
|
PA1 - PA3 |
PA1 - PA3 |
|
[PF1 - PF24 |
PF1 - PF24 |
|
[print] |
|
|
RESET |
Reset, reset terminal |
|
RIGHT_ARROW |
Cursor right, right |
|
PAGE_UP |
Page up |
|
PAGE_DOWN |
Page down |
|
SYSTEM_REQUEST |
System request |
|
TAB |
Tab |
|
UP |
Cursor up |
VT
Table 4-16 VT
|
Keywords |
Description |
|---|---|
|
BACKSPACE |
Back space |
|
BREAK |
Break |
|
CLEAR |
Clear or clear display |
|
CURSOR_SELECT |
Cursor select |
|
DELETE_CHAR |
Delete, delete character |
|
DOWN |
Cursor down |
|
EK_FIND |
Edit keypad find |
|
EK_INSERT |
Edit keypad insert |
|
EK_NEXT |
Edit keypad next |
|
EK_PREV |
Edit keypad previous |
|
EK_REMOVE |
Edit keypad remove |
|
EK_SELECT |
Edit keypad select |
|
ENTER |
Enter |
|
END_FILE |
End of field |
|
F1 - F24 |
F1 - F24 |
|
HOLD |
Hold |
|
HOME |
Home |
|
INSERT |
Insert |
|
KEYPAD_COMMA |
Keypad comma |
|
KEYPAD_DOT |
Keypad decimal |
|
KEYPAD_MINUS |
Keypad minus |
|
KEYPAD_ENTER |
Keypad enter |
|
KEYPAD0 - KEYPAD9 |
Keypad 0 - Keypad 9 |
|
LEFT_ARROW: |
Cursor left |
|
PF1 - PF20 |
PF1 - PF20 |
|
PAGE_DOWN |
Page down |
|
PAGE_UP |
Page up |
|
RESET |
Reset, reset terminal |
|
RETURN |
Return, carriage return |
|
RIGHT_ARROW |
Cursor right, right |
|
TAB |
Tab key |
|
UDK16 - UDK20 |
User defined key 6 - User defined key 20 |
|
UP |
Cursor up |
UTS
Table 4-17 UTS
|
Key word |
Description |
|---|---|
|
BACKSPACE |
Moves the cursor to the previous tab position on the screen. |
|
BACKTAB |
Back tab <Shift> <Tab> |
|
CHAR_ERASE |
Erases character at the cursor and advances the cursor. |
|
CLEAR_DISPLAY |
Clear display |
|
CLEAR_EOD |
Clear to end of display |
|
CLEAR_EOF |
Clear to end of field |
|
CLEAR_EOL |
Clear to end of line |
|
CLEAR_FCC |
Clear Field Control Character |
|
CLEAR_HOME |
Clear display and cursor home |
|
CONTROL_PAGE |
Toggles the control page |
|
DELETE_LINE |
Deletes the line containing the cursor and shifts remaining lines up one row |
|
DOWN |
Moves the cursor down one line. Wraps at bottom. |
|
DELIN_LINE |
Deletes character under cursor and shifts remaining characters on line to the left. |
|
DELIN_PAGE |
Deletes character under cursor and shifts remaining characters on page to the left. |
|
DUP_LINE |
Creates a copy of the current line and overwrites the next line with the duplicate. |
|
EURO |
Inserts the Euro character |
|
END_FIELD |
Moves the cursor to the end of the current field. |
|
END_PAGE |
Moves the cursor to the end of the current page. |
|
F1 - F22 |
Function keys F1-F22 |
|
HOME |
Moves the cursor to beginning of current page (row 1, col 1) |
|
INSERT |
Toggles insert/overwrite mode. |
|
INSERT_IN_LINE |
Inserts space at cursor position and shifts the remaining characters on the line to the right. The character in the far right column on the line is discarded. |
|
INSERT_IN_PAGE |
Inserts space at cursor position and shifts the remaining characters on the page to the right. The character in the far right column on each line is discarded. |
|
INSERT_LINE |
Inserts a new line at the cursor row and shifts the remaining lines down. The last row on the page is discarded. |
|
LEFT_ARROW |
Moves the cursor one position to the left wrapping if necessary. |
|
LOCATE_FCC |
Finds the next field control character on the screen. |
|
MSG_WAIT |
Retrieves messages queued to the terminal. |
|
RETURN |
Carriage return |
|
RIGHT_ARROW |
Moves the cursor one position to the right, wrapping if necessary. |
|
SOE |
Inserts the Start of Entry character |
|
START_OF_FIELD |
Moves the cursor to the beginning of the field. |
|
START_OF_LINE |
Moves the cursor to column 1 of current line. |
|
TAB |
Moves the cursor to the next tab position of the screen. |
|
TOGGLE_COL_SEP |
Toggles the column separator attribute. |
|
TOGGLE_STRIKE_THRU |
Toggles the strike-through attribute on the current data cell. |
|
TOGGLE_UNDERLINE |
Toggles the underline attribute on the current data cell. |
|
TRANSMIT |
Transmits changed field data to the host. |
|
UNLOCK |
Sends the UNLOCK key to the host. |
|
UP |
Moves the cursor up one row, wrapping if necessary. |
DataCell
The DataCell object provides information about a particular position on a terminal screen.
Table 4-18 DataCell
|
METHODS |
|
|---|---|
|
getPosition() |
Returns the position of this data cell on the screen. Returns {Position} the position of the data cell on the screen |
|
getChar() |
Obtains the character associated with the cell. Returns {String} The character associated with the cell. |
|
getAttributes() |
Returns the set of attributes specified for this data cell instance. See AttributeSet. Returns {AttributeSet}Of attributes for this data cell instance. |
|
getForegroundColor() |
Returns the foreground color, as defined in the Color object, for this data cell. Returns {Number}Foreground color for this data cell. The color is defined in the Color object. |
|
getBackgroundColor() |
Returns the background color, as defined in the Color object, for this data cell. Returns {Number}Background color for this data cell. The color is defined in the Color object. |
|
toString |
Converts the internal data cell to a string. Returns {String} The string representation of a data cell. |
|
isFieldDelimiter() |
Tests if this cell represents a field delimiter. Returns {Boolean} True if this cell is a field delimiter, false if otherwise. |
Dimension
Represents the size of the screen or screen area.
Table 4-19 Dimension
|
Method |
|
|---|---|
|
Dimension(rows,cols) |
Creates a new Dimension instance. Parameters {Number} rows screen rows dimension {Number} cols screen columns dimension |
Field
Use the Field object, along with FieldList, to obtain the information present in a field on the screen.
Table 4-20 Field
|
Method |
|
|---|---|
|
getAttributes() |
Returns the set of attributes specified for this field instance. See AttributeSet. Returns {AttributeSet} The set of attributes for this field |
|
getForegroundColor() |
Returns the foreground color of the field. Returns {Number} the foreground color for this field. These values are defined in the Color object. |
|
getBackgroundColor() |
Returns the background color of the field. Returns {Number} the background color for this field. These values are defined in the Color object. |
|
getStart() |
Returns the starting position of the field. The starting position is the position of the first character of the field. Some host types use a character position to store field level attributes. In this case, the attribute position is not considered the start position. Returns {Position} Starting position of the field. Throws {RangeError} For zero length fields. |
|
getEnd() |
Returns the ending position of the field. The ending position is the position in the presentation space containing the last character of the field. Returns {Position} Ending position of the field. Throws {RangeError} For zero length fields. |
|
getLength() |
Returns the length of the field. For host types that use a character position to store the field attributes, the field length does not include the field attribute position. Returns {Number} Length of the field. |
|
getDataCells() |
Obtains the data cells that comprise this field. SeeDataCell . Returns {DataCell[]}Data cells that comprise this field. |
|
getText() |
Obtains the text from the field. Returns {String} field text. |
|
setText() |
Sets the field text. For certain host types, like VT, the text is transmitted to the host right away, but in other host types, the text is not transmitted to the host until an Aid key is invoked. If the text is shorter than the field, the text is placed in the host field, and the remainder of the field is cleared. If the text is longer than the host field, then as much text as will fit is placed in the field. Parameters {String}Text to set on the field. Throws {Error} If the field is protected. |
|
clearField() |
Clears the current field in an emulation-specific manner. Throws {Error} If the field is protected or clear is not supported. |
|
getPresentationSpace() |
Obtains the PresentationSpace which created this field. Returns {PresentationSpace} Parent of this field instance. |
|
toString() |
Creates a user-friendly description of the field. Returns {String} A user readable rendition of the field. |
FieldList
Use the FieldList object, along with Field object, to obtain field list information.
Table 4-21 FieldList
|
Method |
|
|---|---|
|
getPresentationSpace() |
Obtains the PresentationSpace which created this field list. Returns {PresentationSpace}Parent of this field list instance. |
|
findField(position, text, direction) |
Returns the field containing the specified text. The search starts from the specified position and proceeds either forward or backward. If the string spans multiple fields, the field containing the starting position is returned. When searching forward the search will not wrap to the top of the screen. When searching backward the search will not wrap to the bottom of the screen. Parameters {Position} Position from which to start the search. See Position object. {String} The text to search for (optional). If not provided, returns the next field to the right of or below the specified position. {Number} direction of the search (optional). Use PresentationSpace. SearchDirection constants for this parameter. For example, PresentationSpace.SearchDirection.FORWARD or PresentationSpace.SearchDirection.BACKWARD. If not provided, searches forward. Returns {Field} containing the string or null if a field meeting the given criteria is not found. Throws {RangeError} If the position is out of range. |
|
get(index) |
Obtains the field at the given index. Parameters {Number}index into the field list. Returns {Field} located at the specified index. Throws {RangeError} If the index is out of range. |
|
isEmpty() |
Determines if the field list is empty. Returns {Boolean} True if the list is empty. |
|
size() |
Indicates the number of fields in the list. Returns {Number} The field count |
|
toString() |
Creates a user-friendly description of the field list. Returns {String} User readable rendition of the field list. |
FileTransferFactory
A fileTransferFactory object is available to all macros. If file transfers are configured for the session, you can use it to get a reference to a FileTransfer object.
Table 4-22 fileTransferFactory
|
Method |
|
|---|---|
|
getIND$File() |
Returns a FileTransfer object for interacting with the configured Ind$File type for the session. Returns {FileTransfer} Throws {Error} If the session hasn’t been configured to allow IND$File transfers. |
FileTransfer
Use the FileTransfer object to list and transfer files between the host system and the client.
The Reflection ZFE file transfer API abstracts the file path conventions used by different host file implementations. Follow URL or Linux file system path formats when formatting file paths used by the API. For example, /root/directory/file. It is important to observe any rules specific to host systems, such as allowable characters or name lengths.
NOTE:Browsers place significant security restrictions around the ability of Javascript to interact with client file systems.
Table 4-23 FileTransfer
|
Method |
|
|---|---|
|
getHostFileListing(remotePath) |
Request a listing of host files. If remotePath is omitted, a file listing for the current remote working directory is shown. Parameters {String} (optional) If specified will get file listing for specified remote path. If not specified, will get file listing for current remote working directory. Returns {Promise} Resolves to an array of HostFile objects contained at remoteName. Rejected if the remote path can not be read. |
|
sendFile(localFile, remoteName) |
Sends specified file to the host. Parameters {File} Javascript file object pointing to local file to send. {String} Fully-qualified remote file name as allowed by remote system (Unix, Windows, MVS, VAX). Returns {Promise} fulfilled with a HostFile object representing the sent file on success. Rejected if an error occurred sending the file. |
|
getDownloadURL(remoteName) |
Constructs a link to download a file from a host system. Parameters {String} Fully-qualified remote file name as allowed by remote system (Unix, Windows, MVS, VAX). Returns {URL} that can be used to retrieve the file from the Reflection ZFE session server. |
|
setTransferOptions(options) |
Set transfer options for current FileTransfer session. The transfer options are applied to all future transfers until the session is either exited or overridden by another call to setTransferOptions. Parameters {JSON} see FileTransferOptions for allowed names and values. Returns {Promise} fulfilled when the call completes. Rejected if an error occurred setting the options. |
|
cancel() |
Cancels the current transfer in progress. Returns {Promise} fulfilled when the call completes. Rejected if an error occurred canceling the transfer. |
HostFile
A HostFile object represents a file on the host file system.
Table 4-24 HostFile
|
Method |
|
|---|---|
|
getName() |
Gets the file name Returns {String} the file name. |
|
getParent() |
Gets the parent of this host file Returns {String} the parent of this host file. This means different things on different host types. For example on TSO this is the name of the catalog in which the file resides. |
|
getSize() |
The byte size of the file Returns {Number} the size of the file in bytes. |
|
getType() |
The type of file represented Returns |
Host File Type
The HostFileType object defines constants for determining the type of a HostFile object.
Table 4-25 HostFileType
|
Value |
Description |
|---|---|
|
FILE |
Represents a file on the host system. |
|
DIR |
Represents a directory on the host system. |
|
UNKNOWN |
Represents a host file of unknown origin. |
File Transfer Options
File transfer option object specification.
Example: fileTransfer.setTransferOptions({ transferMethod : 'ascii' });
Table 4-26 FileTransferOptions
|
Method |
|
|---|---|
|
transferMethod |
{String}Allowed values:
|
OIA
Operator Information Area (OIA) interface. The OIA object returns values which are defined in the OIAStatus object.
Table 4-27 OIA
|
Method |
|
|---|---|
|
getStatus () |
Returns the set of enabled status flags. See StatusSet. Parameters Returns {StatusSet} Containing the status information. |
|
getCommErrorCode() |
Returns the current communication error code. Returns {Number} the current communication error code. If one doesn’t exist, it will be 0. |
|
getProgErrorCode() |
Returns the current program error code Returns {Number} the current program error code. If one doesn’t exist, it will be 0. |
OIAStatus
Table 4-28 OIAStatus
|
OIAStatus |
Description |
|---|---|
|
CONTROLLER_READY |
Controller ready |
|
A_LINE |
Online with a non-SNA connection |
|
MY_JOB |
Connected to a host application |
|
OP_SYS |
Connected to a SSCP (SNA) |
|
UNOWNED |
Not connected |
|
TIME |
Keyboard inhibited |
|
SYS_LOCK |
System lock following AID key |
|
COMM_CHECK |
Communication check |
|
PROG_CHECK |
Program check |
|
ELSEWHERE |
Keystroke invalid at cursor location |
|
FN_MINUS |
Function not available |
|
WHAT_KEY |
Keystroke invalid |
|
MORE_THAN |
Too many characters entered in the field |
|
SYM_MINUS |
Symbol entered not available |
|
INPUT_ERROR |
Operator input error (5250 only) |
|
DO_NOT_ENTER |
Do not enter |
|
INSERT |
Cursor in insert mode |
|
GR_CURSOR |
Cursor in graphics mode |
|
COMM_ERR_REM |
Communications error reminder |
|
MSG_WAITING |
Message waiting indicator |
|
ENCRYPT |
Session is encrypted |
|
NUM_FIELD |
Invalid character in numeric only field |
AutoSignon
Some mainframe hosts have a Digital Certificate Access Server (DCAS). You can request a temporary, one-time pass ticket from DCAS for logging into a host application. Using this object, you can write and configure a macro to run when the session starts and to automatically log you in using the credentials of the currently logged in Reflection ZFE user.
Table 4-29 AutoSignon
|
Method |
|
|---|---|
|
getPassTicket() |
Obtains a pass ticket to be used for signing onto a mainframe application. Multiple pass tickets may be requested using different application IDs. Parameters {String} application ID tells the host which application the sign on is for Returns {Promise} fulfilled with the pass ticket key or rejected if the operation fails. The pass ticket obtained from DCAS only works with the current host session and is valid for ten minutes. |
|
sendUserName() |
Applies the user name contained in the pass ticket to the field at the current cursor location on the current host screen. The user name must be sent before the password. Sending the password first will invalidate the pass ticket, and you will need to get another one. Parameters {String} passTicketKey opbtained from getPassTicket Returns {Promise} fulfilled if the user name is successfully sent. Rejected if the operation fails. |
|
sendPassword() |
Applies the password contained in the pass ticket to the field at the current cursor location on the current host screen. The user name must be sent before the password. Sending the password first will invalidate the pass ticket, and you will need to get another one. Parameters {String} passTicketKey obtained from getPassTicket Returns {Promise} fulfilled if the password is successfully sent. Rejected if the operation fails. |
Position
Represents a row and column on the screen.
Table 4-30 Position
|
Method |
|
|---|---|
|
Position(row,col) |
Creates a new Position instance. Parameters {Number} row screen row coordinate {Number} col screen column coordinate |
PresentationSpace
Use the PresentationSpace object to interact with the terminal screen. Setting and getting the cursor position, sending keys, and reading text are some of the interactions available.
Table 4-31 PresentationSpace
|
METHODS |
|
|---|---|
|
getCursorPosition() |
Returns a Position instance representing the current cursor position. An unconnected session has a cursor position of 0,0. Returns {Position} current cursor location |
|
setCursorPosition(position) |
Moves the host cursor to the specified row and column position. For some hosts, such as VT, the host may constrain the movements of the cursor. Parameters {Position} Position new cursor position. Returns None Throws {RangeError} If the position is not valid on the current screen. |
|
isCursorVisible() |
Tests that the cursor is currently visible in the presentation space. The cursor is considered not visible if the session is not connected. Returns {Boolean} True if the cursor is visible. False if the cursor is not visible. |
|
sendKeys(keys) |
Transmits a text string or ControlKey to the host at the current cursor position in the presentation space. If the cursor is not in the desired position, then use setCursorPosition function first. The text string can contain any number of characters and ControlKey objects. For example: "myname" + ControlKey.TAB + "mypass" + ControlKey.ENTER will transmit a user ID, tab to the next field, transmit a password, and then transmit the Enter key. If you need to transmit a square bracket, double the brackets ([[ or ]]). Parameters {String} keys text and/or control keys to transmit |
|
getText(position,length) |
Returns a string representing a linear area of the presentation space. No new line characters are inserted if row boundaries are encountered. Parameters {Position} start position from which to retrieve text {Number} length the maximum number of characters to return. If the length parameter causes the last position of the presentation space to be exceeded then only those characters up to the last position will be returned. Returns {String) representing a linear area of the presentation space which may be empty if the session is not connected. Throws {RangeError} If the position or length are not valid on the current screen. |
|
getSize() |
Gets the dimensions of the screen as a Dimension object. Returns {Dimension} Containing the number of rows and columns. The screen size is [row:0, col:0] if the session is not connected. |
|
getDataCells(start, length) |
Returns DataCell instances where the first member will be for the position specified by the start parameter. The maximum number of DataCell instances in the list is specified by the length parameter. Parameters {Position} start the first position on the host screen in which to retrieve DataCell instances. See Position. {Number} length of the maximum number of DataCell instance to be retrieved. If not specified, returns DataCells from the start position to the end of the screen. Returns {DataCell[]} Instances which may be empty if the session is not connected. If position is not specified, returns all DataCells. If length is not specified, returns DataCells from the start position to the end of the screen. Throws {RangeError} if start or length are out of range. |
|
getFields() |
Returns a list of the fields in the presentation space. If the host type does not support fields or the current screen is not formatted then the return value will always be an empty list. See FieldList. Returns {FieldList} of host defined fields in the presentation space. |
Session
The session object is the main entry point for interacting with the host. It contains functions for connecting, disconnecting, and obtaining the PresentationSpace object.
Table 4-32 Session object functions
|
METHODS |
|
|---|---|
|
connect() |
Connects to the configured host. If needed, use wait.forConnect() to block macro execution until the session is connected. Returns None |
|
disconnect() |
Disconnects from the configured host. If needed, use wait.forDisconnect() to block macro execution until the session is connected. Returns None |
|
isConnected() |
Determines whether the connection to the host is connected. Returns {Boolean} true if host connection is established; false if not |
|
getPresentationSpace() |
Provides access to the PresentationSpace instance for this session. Returns {PresentationSpace} instance associated with this session. |
|
getDeviceName() |
Returns the connected available device name, the configured device name, or null if no device name is configured. The connected device name is the name agreed upon during the connection negotiation process between the host and the terminal. It may be what is specified, or it could possibly be different, if for example a device name pool was specified. Returns {String}The connected device name, the configured device name, or null. |
|
getType() |
Returns the type of host session. See SessionType. Returns {String} The type of host session. |
|
setDeviceName() |
Provides a means to modify the device name on a session instance. Parameters {String} name Device name to use when connecting to a host. Throws {Error} If an attempt is made to set the device name while the session is connected. |
|
getOIA() |
Provides access to the OIA instance for this session. Returns {OIA} Associated with this session |
SessionType
Constants used to identity the type of host to which the connection is being made. See Session object.
Table 4-33 SessionType
|
Host Type |
Description |
|---|---|
|
IBM_3270 |
Indicates an IBM 3270 terminal session. |
|
IBM_5250 |
Indicates an IBM 5250 terminal session. |
|
VT |
Indicates a VT session. |
StatusSet
You can use the StatusSet object to decode the OIA status. The StatusSet object returns values defined in the OIAStatus object and when used together, you can get status information from the OIA.
Table 4-34 StatusSet
|
Method |
|
|---|---|
|
contains(statusFlag) |
Determines if the set contains the specified status flag from OIAStatus constants. Parameters {Number} statusFlag status to check Returns {Boolean} True if the status flag is present in the set. |
|
isEmpty() |
Determines if the status set is empty. Returns {Boolean} True if the set is empty. |
|
size() |
Indicates the number of status flags in the set. Returns {Number} The status count |
|
toArray() |
Converts the internal status set to an array. Returns {Object []} Array of status flags in the set. |
|
toString() |
Converts the internal status set to a string. Returns {String} Space delimited names of status flags in the set. |
|
forEach(callback, thisArg) |
Function to iterate over each element in the status set. Parameters {forEachCallback} Callback to perform the specific operation. Called with the name of each status in the set. {Object} thisArg optional pointer to a context object. |
|
forEachCallback(string, thisArg) |
A user provided callback function where you provide the behavior, to be used as the callback parameter to forEach. Parameters {String} String The name of a status in the status set. {Object} thisArg Optional pointer to a context object |
User Interface
The user interface object provides functions for interacting with the user, prompting for and displaying basic information. The UI object is made automatically available in your macro as the “ui” variable”.
NOTE:Important! All UI functions require the ‘yield’ keyword in front of them. This allows the macro to block execution until the conditions of the UI function have been met.
[parameter] denotes an optional parameter.
Table 4-35 User Interaction
|
METHODS |
|
|---|---|
|
prompt(message,[defaultAnswer], [mask]) |
Prompt the user for information in the user interface, Parameters {String} message title to display to the user. Default: blank String. {String} defaultAnswer to use if user leaves it blank. Default: blank String {Boolean} mask indicates whether to hide the prompt (as with a password). Returns {Promise} Fulfilled when the user closes the dialog window. Returns the users input on “OK” or null on “Cancel”. |
|
message([message]) |
Display a message in the user interface. Parameters {String} message to display to the user. Default: blank String. Returns {Promise} Fulfilled when the user closes the message window. |
Wait
Use the wait object to wait for a particular session or screen state. For example, you can wait until the cursor is found at a particular location or text is present at a certain location before continuing with the macro execution.
Wait functions are often used in conjunction with asynchronous functions such as connect() and sendKeys().
NOTE:All functions take timeouts as an optional parameter and have a default time out value of 10 seconds (10000ms).
Important: All wait functions require the ‘yield’ keyword in front of them. This allows the macro to block execution until the conditions of the wait function are met.
[parameter] denotes an optional parameter.
Table 4-36 Waiting for the host
|
METHODS |
|
|---|---|
|
setDefaultTimeout(timeout) |
Sets the default timeout value for all functions. Parameters {Number} default timeout to use for all wait functions in milliseconds. Returns None Throws {RangeError} If the specified timeout is less than zero. |
|
forConnect([timeout]) |
Waits for a connect request to complete. Parameters {Number} in milliseconds. Returns {Promise} Fulfilled if the session is already connected or when connection occurs. Rejected if the wait times out. |
|
forDisconnect([timeout]) |
Waits for a disconnect request to complete. Parameters {Number} timeout in milliseconds. Returns {Promise}Fulfilled if the session is already disconnected or when it finally disconnects. Rejected if the wait times out. |
|
forFixedTime([timeout]) |
Waits unconditionally for fixed time. Time is in milliseconds (ms) Parameters {Number} timeout in milliseconds. Returns {Promise}Fulfilled after time elapses |
|
forCursor(position, [timeout]) |
Waits for the cursor to arrive at the specified position. Parameters {Position} The position specifying the row and column, {Number} timeout in milliseconds Returns {Promise}Fulfilled if the cursor is already located or when it is finally located. Rejected if the wait times out. |
|
forText(string, position, [timeout]) |
Wait for text located at a specific position on the screen Parameters {String} text to expect {Position} position specifying the row and column {Number}timeout in milliseconds Returns {Promise} Fulfilled if the text is already at the specified position or whenever it is located. Rejected if the wait times out. Throws {rangeError} if the position is not valid. |
|
forHostPrompt(string, column,[timeout]) |
Waits for a command prompt located at a particular column on the screen. Parameters {String} text prompt to expect {Number} column where cursor is expected {Number} timeout in milliseconds. Returns {Promise} Fulfilled if the conditions are already met or when the conditions are finally met. Rejected if the wait times out. Throws {rangeError} if the column is out of range. |
Sample Macros
To help you create successful macros that take advantage of all the capabilities of the Macro Editor and Reflection ZFE, these samples are available as a starting point.
Basic Host Interaction
This sample illustrates basic host interaction, including:
-
Sending data to the host
-
Waiting for screens to display
-
Using the yield keyword to wait for asynchronous functions
-
Reading text from the screen
-
Displaying basic information to the user
-
Handling error basics
All macros have the following objects available by default:
-
session - Main entry point for access to the host. Can connect, disconnect and provides access to the PresentationSpace.
The PresentationSpace object obtained from the session represents the screen and provides many common capabilities such as getting and setting the cursor location, sending data to the host and reading from the screen.
-
wait - Provides a simple way to wait for various host states before continuing to send more data or read from the screen.
-
UI - Provides basic user interface capabilities. Display data to the user or prompt them for information.
// Create a new macro function
var macro = createMacro(function*(){
  'use strict';

  // All macros have the following objects available by default:
  // 1. session - Main entry point for access to the host. Can connect, disconnect and provides access to the PresentationSpace.
  //    The PresentationSpace object obtained from the session represents the screen and provides many common capabilities such as getting and setting the
  //    cursor location, sending data to the host and reading from the screen.
  // 2. wait - Provides a simple way to wait for various host states before continuing to send more data or read from the screen.
  // 3. ui - Provides basic User Interaction capabilities. Display data to the user or prompt them for information.

  // Declare a variable for reading and displaying some screen data.
  // As a best practice all variables should be declared near the top of a function.
  var numberOfAccounts = 0;

  // Start by obtaining the PresentationSpace object, which provides many common screen operations.
  var ps = session.getPresentationSpace();

  try {
    // Can set and get the cursor location
    ps.setCursorPosition(new Position(24, 2));

    // Use the sendKeys function to send characters to the host
    ps.sendKeys('cics');

    // SendKeys is also used to send host keys such as PA and PF keys.
    // See "Control Keys" in the documentation for all available options
    ps.sendKeys(ControlKey.ENTER);

    // Wait for the cursor to be at the correct position.
    // The wait object provides various functions for waiting for certain states to occur
    // so that you can proceed to either send more keys or read data from the screen.
    yield wait.forCursor(new Position(24, 2));

    // You can mix characters and control keys in one sendKeys call.
    ps.sendKeys('data' + ControlKey.TAB + ControlKey.TAB + 'more data' + ControlKey.ENTER);

    // The "yield" keyword must be used in front of all "wait" and "ui" function calls.
    // It tells the browser to pause execution of the macro until the
    // (asynchronous) wait function returns.  Consult the documentation for which functions
    // require the yield keyword.
    yield wait.forCursor(new Position(10, 26));
    ps.sendKeys('accounts' + ControlKey.ENTER);

    // Can also wait for text to appear at certain areas on the screen
    yield wait.forText('ACCOUNTS', new Position(3, 36)) ;
    ps.sendKeys('1' + ControlKey.ENTER);

    // All wait functions will timeout if the criteria is not met within a time limit.
    // Can increase timeouts with an optional parameter in the wait functions (in milliseconds)
    // All timeouts are specified in milliseconds and the default value is 10 seconds (10000ms).
    yield wait.forCursor(new Position(1, 1), 15000);
    ps.sendKeys('A' + ControlKey.ENTER);

     // PS provides the getText function for reading text from the screen
    numberOfAccounts = ps.getText(new Position(12, 3), 5);

    // Use the ui object to display some data from the screen
    ui.message('Number of active accounts: ' + numberOfAccounts);

    // The try / catch allows all errors to be caught and reported in a central location
  } catch (error) {
    // Again we use the ui object to display a message that an error occurred
    yield ui.message('Error: ' + error.message);
  }
  //End Generated Macro
});

// Run the macro and return the results to the Macro Runner
// The return statement is required as the ZFE application leverages
// this to know if the macro succeeded and when it is finished
return macro();
User Interaction
This sample illustrates how to use the provided API methods to prompt the user for input or alert them with a message.
var macro = createMacro(function*(){
  'use strict';

  // The "ui" object provides functions for prompting the user for information and displaying information

  // Declare variables for later use
  var username;
  var password;
  var flavor;
  var scoops;

  //Begin Generated Macro
  var ps = session.getPresentationSpace();

  try {
    // Prompt the user to enter their name and store it in a variable.
    // Note that 'yield' keyword is needed to block execution while waiting for the user input.
    username = yield ui.prompt('Please enter your username');

    // Prompt the user to enter a value with a default provided to them.
    flavor = yield ui.prompt('What is your favorite flavor of ice cream?', 'Chocolate');

    // Prompt the user to enter private information by using the 'mask' option and the input field will be masked as they type.
    // If a parameter is not used, 'null' can be used to specify that it isn't to be used.
    // Here we illustrate that by specifying that we don't need to show a default value .
    password = yield ui.prompt('Please enter your password', null, true);

    // The prompt function returns null if the user clicks the 'Cancel' button instead of the 'OK' button.
    // One way to handle that case is to wrap the call in a try/catch block.
    scoops = yield ui.prompt('How many scoops would you like?');
    if (scoops === null) {
      // This will exit the macro.
      return;
      // Alternatively could throw an Error and have it be caught in the "catch" below
    }
   // Use the collected values to order our ice cream
    ps.sendKeys(username + ControlKey.TAB + password + ControlKey.ENTER);
    yield wait.forCursor(new Position(5, 1));
    ps.sendKeys(flavor + ControlKey.TAB + scoops + ControlKey.ENTER);

    // Display a message to the user.  Using the 'yield' keyword in front of the call will block
    // further execution of the macro until the user clicks the 'OK' button.
    yield ui.message('Order successful.  Enjoy your ' + scoops + ' scoops of ' + flavor + ' ice cream ' + username + '!');
  } catch (error) {
    // Here we use the ui object to display a message that an error occurred
    yield ui.message(error.message);
  }
  //End Generated Macro

 });

 return macro();
Paging Through Data
This sample illustrates how to page through a variable number of screens and process the data on each screen.
 // Create a new macro function.
var macro = createMacro(function*(){
  'use strict';

  // Create variable(s) for later use
  var password;
  var accountNumber;
  var transactionCount = 0;
  var row = 0;

  // Obtain a reference to the PresentationSpace object.
  var ps = session.getPresentationSpace();

  try {
    // Enter Username and Password to log on to the application.
    yield wait.forCursor(new Position(19, 48));
    ps.sendKeys('bjones' + ControlKey.TAB);

    yield wait.forCursor(new Position(20, 48));
    password = yield ui.prompt('Password:', null, true);
    ps.sendKeys(password);
    ps.sendKeys(ControlKey.ENTER);

    // Enter an application command.
    yield wait.forCursor(new Position(20, 38));
    ps.sendKeys('4');
    ps.sendKeys(ControlKey.ENTER);

    // Going to list transactions for an account.
    yield wait.forCursor(new Position(13, 25));
    ps.sendKeys('2');
    // Input an account number.  Hard coded here for simplicity.
    yield wait.forCursor(new Position(15, 25));
    accountNumber = yield ui.prompt('Account Number:', '167439459');
    ps.sendKeys(accountNumber);
    ps.sendKeys(ControlKey.ENTER);

    // Wait until on account profile screen
    yield wait.forText('ACCOUNT PROFILE', new Position(3, 33));

    // Search for text that indicates the last page of record has been reached
    while (ps.getText(new Position(22, 12), 9) !== 'LAST PAGE') {

      // While the last page of record has not been reached, go to the next page of records.
      ps.sendKeys(ControlKey.PF2);
      yield wait.forCursor(new Position(1, 1));

      // If the cursor position does not change between record screens, and there is no text
      // on the screen you can check to confirm a screen is updated, you may wait for a
      // fixed time period after an aid key is sent for the screen to settle.
      // For example:
      // yield wait.forFixedTime(1000);

      // For each of the rows, increment the count variable if it contains data.
      for (row = 5; row <= 21; row++) {

        // There are 2 columns on the screen. Check data on column 1.
        // In this eaxmple we know that if there is a space at a particular
        // position then there is a transaction.
        if (ps.getText(new Position(row, 8), 1) !== ' ') {
          transactionCount++;
        }
        // Check data on column 2.
        if (ps.getText(new Position(row, 49), 1) !== ' ') {
          transactionCount++;
        }
      }
    }
 // Check data on column 2.
        if (ps.getText(new Position(row, 49), 1) !== ' ') {
          transactionCount++;
        }
      }
    }

    // After going through all record pages, display the number of records in a message box.
    yield ui.message('There are ' + transactionCount + ' records found for account ' + accountNumber + '.');

    // Log out of the application
    ps.sendKeys(ControlKey.PF13);
    ps.sendKeys(ControlKey.PF12);

    // The try / catch allows all errors to be caught and reported in a central location
  } catch (error) {
    // Here we use the ui object to display a message that an error occurred
    yield ui.message(error.message);
  }
});

// Here we run the macro and return the results to the Macro Runner
// The return statement is required as the ZFE application leverages
// this to know if the macro succeeded
return macro();
Invoking a Web Service
This sample illustrates how to make an AJAX / REST call directly from a macro to a web service. You can integrate data from your host application into the web service call or from the web service into your host application.
In this example, we are calling the Verastream Host Integrator (VHI) CICSAcctsDemo REST service. However, you can easily adapt the code to call any web service. You are not limited to VHI.
In the example the call goes through a proxy configured in the session server (shown below) to avoid a “Same Origin Policy” complication. If you are using a web service that supports Cross-origin Resource Sharing (CORS) and are using a modern browser, the proxy is unnecessary.
Since the jQuery library is available in macros, so you may use the $.post() function directly to invoke REST services.
This example also demonstrates how to wrap a jQuery REST call in a new Promise. The promise returned from the custom function below allows "yield" to be used in the main macro code. This allows the main macro execution to wait until the service call is complete before continuing.
 var macro = createMacro(function*() {
  'use strict';

  // Create a few variables for later user
  var username;
  var password;
  var accountNumber;
  var accountDetails;

  // Create a function that will make an AJAX / REST call to a VHI Web Service.
  // Could be adjusted to call any web service, not just VHI.
  // If not using CORS, the request will likely need to pass through a
  // proxy on the session server. See sample notes for more information.
  /**
   * Hand-coded helper function to encapsulate AJAX / REST parameters, invoke the
   * REST service and return the results inside a Promise.
   * @param {Number} acctNum to send to the REST query.
   * @param {String} username to access the REST service.
   * @param {String} password to access the REST service.
   * @return {Promise} containing $.post() results that are compatible with yield.
  */
  var getAccountDetails = function (acctNum, username, password) {
    var url = "proxy1/model/CICSAcctsDemo/GetAccountDetail";
    var args = {"filters": {"AcctNum": acctNum}, "envVars": {"Username": username, "Password": password}};

    // Wrap a jQuery AJAX / HTTP POST call in a new Promise.
    // The promise being returned here allows the macro to yield / wait
    // for its completion.
    return Promise.resolve($.post(url, JSON.stringify(args)))
      .catch(function (error) {
      // Map errors that happen in the jQuery call to our Promise.
      throw new Error('REST API Error: ' + error.statusText);
    });
  };

  // Begin Generated Macro
  var ps = session.getPresentationSpace();
  try {
    // Could interact with the host here, log into a host app, etc...
    // Gather username and password
    username = yield ui.prompt('Username:');
    password = yield ui.prompt('Password:', null, true);
    accountNumber = yield ui.prompt('Account Number:');
    if (!username || !password || !accountNumber) {
      throw new Error('Username or password not specified');
    }

    // Invoke external REST service, and yields / waits for the call to complete.
    accountDetails = yield getAccountDetails(accountNumber, username, password);

    // We now have the data from our external service.
    // Can integrate the data into our local host app or simply display it to the user.
    // For this sample we simply display the resulting account details.
    if (accountDetails.result && accountDetails.result.length > 0) {
      yield ui.message(accountDetails.result[0].FirstName + ' $' + accountDetails.result[0].AcctBalance);
    } else {
      yield ui.message('No records found for account: ' + accountNumber);
    }
  } catch (error) {
    // If an error occurred during the AJAX / REST call
    // or username / password gathering we will end up here.
    yield ui.message(error.message);
  }
});

// Run our macro
return macro();
Cross Origin Scripting Proxy Support
If you have web services that do not support CORS, AJAX/REST calls will fail if they attempt to access a different server than the one where the ZFE application originated. This is a browser security feature.
The Reflection ZFE server provides a way explicitly to proxy to trusted remote servers.
-
Open ..\ReflectionZFE\sessionserver\microservice\zfe\service.yml for editing.
-
In the env section add:
name: zfe.proxy.mappings
value: proxy-path=proxy-to-address
Where proxy-path refers to the desired url-mapping and proxy-to-address refers to the URL where the call will be proxied.
-
In this example:
name: zfe.proxy.mappings
value: proxy1=http://remote-vhi-server:9680/vhi-rs/
Calls made to <server:port>/zfe/proxy1 will be proxied to http://remote-vhi-server:9680/vhi-rs/
-
Multiple proxy mappings can be specified using a comma to separate the individual proxy mappings
-
Keep in mind that even when a REST server supports CORS headers, some older browsers may not, so this example may still be relevant.
HINT:Your service.yml file may be replaced whenever you redeploy Reflection ZFE. Always back up your files.
Working with DataCells and Attributes
This macro illustrates how to use DataCells and AttributeSet to inspect a given row/column on the screen for text and attributes. In this sample you can see:
-
How to get a collection of DataCells for a given position and length.
-
How to iterate through DataCells to build up a text string
-
How, for comparison, you can also do a similar thing using getText().
-
And finally, how to work with attributes, get a string listing, or determine whether specific ones are set at a given screen location.
var macro = createMacro(function*() {
    'use strict';

    // Obtain the PresentationSpace for interacting with the host
    var ps = session.getPresentationSpace();

    // Declare variables for later use
    var cells;
    var text;
    var attrs;

    // Set the default timeout for "wait" functions
    wait.setDefaultTimeout(10000);

    // Sample macro for working with DataCells and Attributes
    try {
        yield wait.forCursor(new Position(24, 2));

        // Get DataCells from the presentation space.
        // Row 19, col 3 is the prompt, 35 characters long
        // "Choose from the following commands:"
        cells = ps.getDataCells({row:19, col:3}, 35);
        text = '';

        // You can display text using getText
        yield ui.message("Screen text: " + ps.getText({row:19, col:3}, 35));

        // Or you can assemble the text from the DataCells at each position
        for(var index = 0; index < cells.length; index++) {
            text = text.concat(cells[index].getChar());
        }
        // And display the text
        yield ui.message("Cells text: " + text);

        // Get the attributes for the first DataCell (cell[0])
        attrs = cells[0].getAttributes();

        // Display whether we have any attributes on the data cell
        yield ui.message("Attribute set is empty: " + attrs.isEmpty());

        // Display how many attributes are set
        yield ui.message("Number of attributes: " + attrs.size());

        // Display which attributes are set
        yield ui.message("Attributes: " + attrs.toString());

        // Now display whether the high intensity attribute is set
        yield ui.message("Is high intensity: " +
                         attrs.contains(Attribute.HIGH_INTENSITY));

        // Now display whether the underline attribute is set
        yield ui.message("Is underline: " +
                         attrs.contains(Attribute.UNDERLINE));

        // Now display whether alphanumeric, intensified and pen-detectable attributes are set
        yield ui.message("Is alphanumeric, intensified and pen-detectable: " +
                         attrs.containsAll([Attribute.ALPHA_NUMERIC, Attribute.HIGH_INTENSITY, Attribute.PEN_DETECTABLE]));

        // Now display whether underline, intensified and pen-detectable attributes are set
        yield ui.message("Is underline, intensified and pen-detectable: " +
                         attrs.containsAll([Attribute.UNDERLINE, Attribute.HIGH_INTENSITY, Attribute.PEN_DETECTABLE]));
    } catch (error) {
        yield ui.message(error);
    }
    //End Generated Macro
});

// Run the macro
return macro();
Using Fields and Field Lists
This macro sample illustrates how to use common functions to interact with the fields in the Macro API. For example, how to get field text, view field information, and how to use field.setText as an alternative to sendKeys to interact with the host.
NOTE:Due to browser considerations ui.message collapses strings of spaces down to a single space. The spaces are preserved in the actual JavaScript.
var macro = createMacro(function*() {
    'use strict';

    // Obtain the PresentationSpace for interacting with the host
    var ps = session.getPresentationSpace();

    // Declare variables for later use
    var fields;
    var field;
    var searchString = 'z/VM';

    // Set the default timeout for "wait" functions
    wait.setDefaultTimeout(10000);

    // Sample macro for working with FieldList and Fields
    try {
        yield wait.forCursor(new Position(24, 2));

        // Get the field list.
        fields = ps.getFields();

        // Run through the entire list of fields and display the field info.
        for(var index = 0; index < fields.size(); index++) {
            field = fields.get(index);

            yield ui.message("Field " + index + " info: " + field.toString());
        }

        yield ui.message("Now, find a field containing the text '" + searchString + "'");
        field = fields.findField(new Position(1, 1), searchString);

        if(field !== null) {
            yield ui.message("Found field info: " + field.toString());
            yield ui.message("Found field foreground is green? " + (Color.GREEN === field.getForegroundColor()));
            yield ui.message("Found field background is default? " + (Color.BLANK_UNSPECIFIED === field.getBackgroundColor()));
        }

        // Now, find command field and modify it.
        field = fields.findField(new Position(23, 80));
        if(field !== null) {
            field.setText("cics");
        }

        yield ui.message("Click to send 'cics' to host.");
        ps.sendKeys(ControlKey.ENTER);

        // Wait for new screen; get new fields.
        yield wait.forCursor(new Position(10, 26));
        fields = ps.getFields();

        // Find user field and set it.
        field = fields.findField(new Position(10, 24));
        if(field !== null) {
            field.setText("myusername");
        }

        // Find password field and set it.
        field = fields.findField(new Position(11, 24));
        if(field !== null) {
            field.setText("mypassword");
        }

        yield ui.message("Click to send login to host.");
        ps.sendKeys(ControlKey.ENTER);

        // Wait for new screen; get new fields.
        yield wait.forCursor(new Position(1, 1));
        fields = ps.getFields();

        // Find command field and set logoff command.
        field = fields.findField(new Position(24, 45));
        if(field !== null) {
            field.setText("cesf logoff");
        }

        yield ui.message("Click to send logoff to host.");
        ps.sendKeys(ControlKey.ENTER);

    } catch (error) {
        yield ui.message(error);
    }
    //End Generated Macro
});

// Run the macro
return macro();
Automatic Sign-On Macro for Mainframes
In this example the Autosignon object is used to create a macro that uses the credentials associated with a user to obtain a pass ticket from the Digital Certificate Access Server (DCAS).
var macro = createMacro(function*() {
    'use strict';

    // Obtain the PresentationSpace for interacting with the host
    var ps = session.getPresentationSpace();

    // Variable for login pass ticket
    var passTicket;

    // Login application ID
    var appId = 'CICSV41A';

    // Set the default timeout for "wait" functions
    wait.setDefaultTimeout(10000);

    // Begin Generated Macro
    try {
        yield wait.forCursor(new Position(24, 2));

        // Obtain a pass ticket from DCAS.
        passTicket = yield autoSignon.getPassTicket(appId);

        ps.sendKeys('cics');
        ps.sendKeys(ControlKey.ENTER);

        yield wait.forCursor(new Position(10, 26));

        // Replace generated username with sendUserName(passTicket) ...
        yield autoSignon.sendUserName(passTicket);

        // ps.sendKeys('bvtst01' + ControlKey.TAB + ControlKey.TAB);
        ps.sendKeys(ControlKey.TAB + ControlKey.TAB);

        yield wait.forCursor(new Position(11, 26));

        // Replace generated password with sendPassword(passTicket) ...
        yield autoSignon.sendPassword(passTicket);

        // var userInput3 = yield ui.prompt('Password:', '', true);
        // if (userInput3 === null) {
            // throw new Error('Password not provided');
        // }
        // ps.sendKeys(userInput3);
        ps.sendKeys(ControlKey.ENTER);

        yield wait.forCursor(new Position(1, 1));
        yield ui.message('Logged in. Log me off.');
        ps.sendKeys('cesf logoff');
        ps.sendKeys(ControlKey.ENTER);
    } catch (error) {
        yield ui.message(error);
    }
    //End Generated Macro
});

// Run the macro
return macro();
Using File Transfer (IND$File)
This series of sample macros demonstrate how to use the File Transfer API to retrieve a list of files, download a file, and upload a file to a 3270 host.
NOTE:You must be logged in and at a ready prompt before running these macros.
List files
This macro demonstrates how to use the File Transfer API to retrieve a list of files on a 3270 host using IND$File transfer. The IND$File transfer object is retrieved from the file transfer factory and then used to obtain an array of HostFile objects from either TSO or CMS.
var macro = createMacro(function*() {
    'use strict';

    try {
        var fileTransfer = fileTransferFactory.getInd$File();
        var hostFiles = yield fileTransfer.getHostFileListing();

        yield ui.message('Found ' + hostFiles.length + ' files');
        if (hostFiles.length > 0) {
            var firstFile = hostFiles[0];
            var msg1 = 'The catalog name is ' + firstFile.getParent() + '.  ';
            var msg2 = 'The first file is ' + firstFile.getName();
            yield ui.message(msg1 + msg2);
        }
    } catch (error) {
        yield ui.message(error);
    }
});

// Run the macro
return macro();
Download file
This macro shows how to use the File Transfer API to download a file from a 3270 host using IND$File transfer. The IND$File transfer object is retrieved from the file transfer factory. In this example the transfer method is set to ASCII to demonstrate use of the setTransferOptions function. The sample macro downloads the first file returned from a call to getHostFileListing by creating a download URI with a call to the getDownloadUrl function.The macro can be used in either a CMS or TSO environment but the choice must be specified on the first line or the code modified slightly for the intended system.
var hostEnvironment = 'CMS';  // 'TSO'
// Construct file path, ie catalog/file.name or catalog/partition/file
function getPath (fileNode) {
    var prefix = fileNode.getParent() ? fileNode.getParent() + '/' : '';
    return prefix + fileNode.getName();
}

var macro = createMacro(function*() {
    'use strict';

    try {
        var fileTransfer = fileTransferFactory.getInd$File();

        // The transferMethod options are 'binary' and 'ascii'
        fileTransfer.setTransferOptions({transferMethod: 'ascii'});

        // This demo retrieves the first file returned in the listing
        var hostFiles = yield fileTransfer.getHostFileListing();
        var firstHostFile = hostFiles[0];

        if (hostEnvironment === 'CMS') {
           yield wait.forText('Ready', new Position(1,1), 5000);
        }

        // Download
        // If you already know the path of the file you want, just pass that to getDownloadURL()
        var downloadUrl = fileTransfer.getDownloadURL(getPath(firstHostFile));

        // This changes the browser location. You may experience different results on different browsers
        window.location = downloadUrl;

        // If you want to read the file contents into a variable instead of downloading
        // it, you can use jQuery
        // var fileContents = yield $.get(downloadUrl);

    } catch (error) {
        yield ui.message(error);
    }
});

// Run the macro
return macro();
Upload file
This macro illustrates how to use the File Transfer API to upload a file to a 3270 host using IND$File transfer. The sample macro prompts the user to choose a file from the local file system by triggering the browser’s file selection dialog. It then retrieves the current catalog on TSO or drive identifier on CMS by calling getHostFileListing. Finally, the sendFile function is called to deliver the selected local file to the host.The macro can be used in either a CMS or TSO environment but the choice should be specified on the first line. In this example, the transfer method is set to ; you may want to change this to .
var hostEnvironment = 'CMS';  // 'TSO'
// Open the browser's file chooser dialog programmatically
function promptForFileToUpload () {
    return new Promise(function (resolve, reject) {
        // We are not notified if the user cancels the file chooser dialog so reject after 30 seconds
        var timerId = setTimeout(reject.bind(null, 'Timed out waiting for file selection'), 30000);
        var fileSelector = document.createElement('input');
        fileSelector.setAttribute('type', 'file');
        fileSelector.onchange = function (evt) {
            var file = evt.target.files[0];
            clearTimeout(timerId);
            resolve(file);
        };
        fileSelector.click();
    });
}

var macro = createMacro(function*() {
    'use strict';

    try {
        var fileTransfer = fileTransferFactory.getInd$File();

       // The transferMethod options are 'binary' and 'ascii'
        fileTransfer.setTransferOptions({transferMethod: 'ascii'});

        var localFile = yield promptForFileToUpload();

        // Retrieve the current catalog name and append the selected file name to it
        var hostFiles = yield fileTransfer.getHostFileListing();
        var destination = hostFiles[0].getParent() + '/' + localFile.name;

        if (hostEnvironment === 'CMS') {
         	yield wait.forText('Ready', new Position(1,1), 5000);
        }

        var result = yield fileTransfer.sendFile(localFile, destination);

    } catch (error) {
        yield ui.message(error);
    }
});

// Run the macro
return macro();